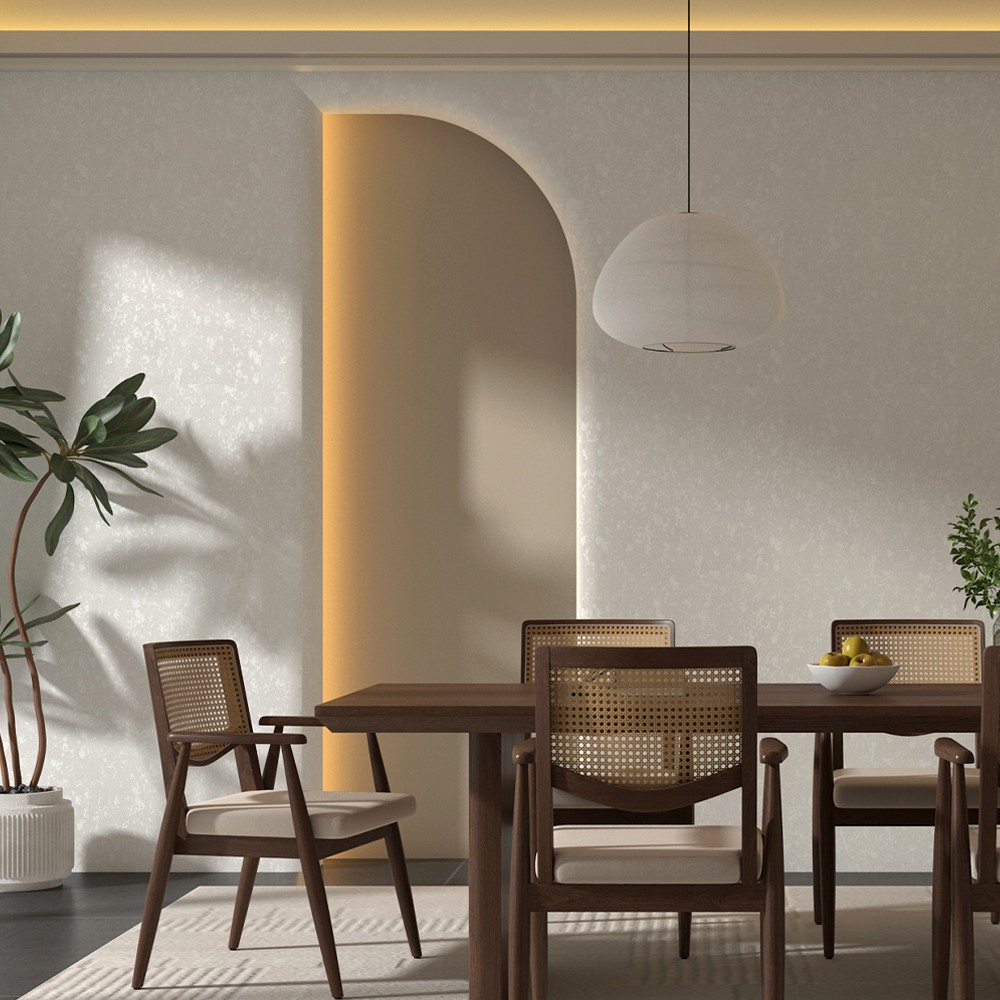
Skim trowel texture is a popular wall and ceiling finishing technique known for its smooth, subtle appearance, making it a favorite in modern and minimalist design. Unlike textured finishes like orange peel or knockdown, which create visible patterns, skim trowel texture involves applying a thin, even layer of joint compound (or "mud") with a trowel, resulting in a surface that’s nearly flat but with a soft, hand-applied warmth. This versatility has made it a go-to choice for homeowners, contractors, and designers looking to balance aesthetics with functionality.

#What Is Skim Trowel Texture?
At its core, skim trowel texture is about precision. It’s a "skim coat"—a thin layer of joint compound, typically 1/16 to 1/8 inch thick—applied over drywall or existing walls. The goal is to create a surface that’s smooth enough for paint or wallpaper but retains a slight, organic texture from the trowel’s movement. This distinguishes it from a perfectly flat "level 5" drywall finish, which requires multiple coats and sanding for a mirror-like surface. Skim trowel texture offers a middle ground: refined yet approachable, hiding minor drywall imperfections while adding depth.
#When to Use Skim Trowel Texture
Skim trowel texture works in nearly any space, but it shines in settings where clean lines and understated elegance are priorities. Modern homes, contemporary offices, and minimalist apartments often use it to complement sleek furniture and neutral color palettes. It’s also ideal for:
- Renovations: Covering outdated textures (like popcorn ceilings) or repairing damaged drywall without a full replacement.
- Accent Walls: Adding subtle texture to a single wall to create focal points without overwhelming the room.
- Commercial Spaces: Restaurants, boutiques, and offices benefit from its durability and easy maintenance—stains wipe clean, and it resists dents better than ultra-smooth surfaces.
#Tools and Materials You’ll Need
Achieving a professional skim trowel texture requires the right tools. Here’s what you’ll need:
- Joint Compound: Use a lightweight, all-purpose joint compound for easy spreading. Avoid heavy-duty compounds, which dry too quickly.
- Trowel: A 12- to 14-inch stainless steel trowel with a rounded edge works best. The size ensures even coverage, and the rounded edge prevents harsh lines.
- Mixing Bucket and Drill with Paddle Mixer: To thin the compound to a smooth, paint-like consistency (add water gradually until it flows easily off the trowel).
- Primer: A high-quality drywall primer seals the surface, helping the compound adhere evenly.
- Sandpaper: 120-grit sandpaper (or a sanding sponge) for smoothing after drying.
- Paint Roller and Tray: For applying primer and final paint.
#Step-by-Step Application Guide
Follow these steps for a flawless skim trowel texture:
##1. Prepare the Surface
Start by cleaning the wall or ceiling thoroughly. Remove dust, grease, and loose paint with a damp cloth. Repair cracks or holes with spackle, let dry, then sand smooth. Apply a coat of primer and let it dry completely (check the primer label for drying time—usually 2-4 hours). Priming ensures the compound bonds well and dries evenly.
##2. Mix the Joint Compound
In a bucket, mix the joint compound with water until it reaches a "pancake batter" consistency—thick enough to stay on the trowel but thin enough to spread easily. Test it by lifting the trowel: the compound should drip slowly, not clump.
##3. Apply the First Coat
Dip the trowel into the compound, loading it lightly. Hold the trowel at a 45-degree angle to the wall and spread the compound in long, even strokes. Work in 3x3-foot sections to avoid the compound drying before you finish. Keep the layer thin—1/16 inch is ideal. Overloading the trowel causes drips or unevenness.
##4. Let It Dry and Sand
Allow the first coat to dry completely (6-8 hours, depending on humidity). Once dry, lightly sand the surface with 120-grit sandpaper to remove ridges or bumps. Wipe away dust with a tack cloth.
##5. Apply the Second Coat (Optional)
For a smoother finish, apply a second thin coat. This time, use overlapping strokes perpendicular to the first coat to fill any gaps. Let dry, then sand again gently.
##6. Paint or Finish
Once sanded, the surface is ready for paint. Use a roller with a ¼-inch nap to avoid adding texture—this ensures the skim trowel’s subtle pattern remains visible.
#Benefits of Skim Trowel Texture
Skim trowel texture offers several advantages over other finishes:
- Aesthetic Flexibility: It pairs with any color—bold hues pop against its neutral backdrop, while pastels look soft and airy.
- Hides Imperfections: Minor dents, scratches, or drywall seams disappear under the thin compound layer.
- Cost-Effective: Compared to level 5 drywall finishes, it requires fewer materials and less labor, making it budget-friendly.
- Timeless Appeal: Unlike trendy textures that date quickly, skim trowel texture remains classic, ensuring your space stays stylish for years.
#Common Mistakes to Avoid
Even DIYers can master skim trowel texture with practice, but watch for these pitfalls:
- Too Thick a Layer: Thick compound dries unevenly, leading to cracks or bubbles. Stick to thin coats.
- Rushing the Drying Time: Let each coat dry fully before sanding or recoating. Humid weather may require extra time—use a fan to speed up drying.
- Using the Wrong Trowel: A small trowel leads to uneven strokes. Invest in a 12-inch or larger trowel for smooth coverage.
#Skim Trowel vs. Other Textures
How does skim trowel texture compare to popular alternatives?
- Orange Peel: Orange peel has a bumpy, textured surface, while skim trowel is smooth with subtle lines.
- Knockdown: Knockdown involves applying thick compound and "knocking down" peaks with a trowel, creating a more pronounced texture. Skim trowel is far softer.
- Popcorn Ceiling: Popcorn is rough and porous, collecting dust; skim trowel is smooth and easy to clean.
#Final Thoughts
Skim trowel texture is a versatile, elegant choice for anyone seeking a refined wall finish. With the right tools and patience, even beginners can achieve professional results. Whether you’re renovating a room or building new, this technique adds subtle sophistication that elevates any space—proof that sometimes, less texture is more.


